3D FDM Printing
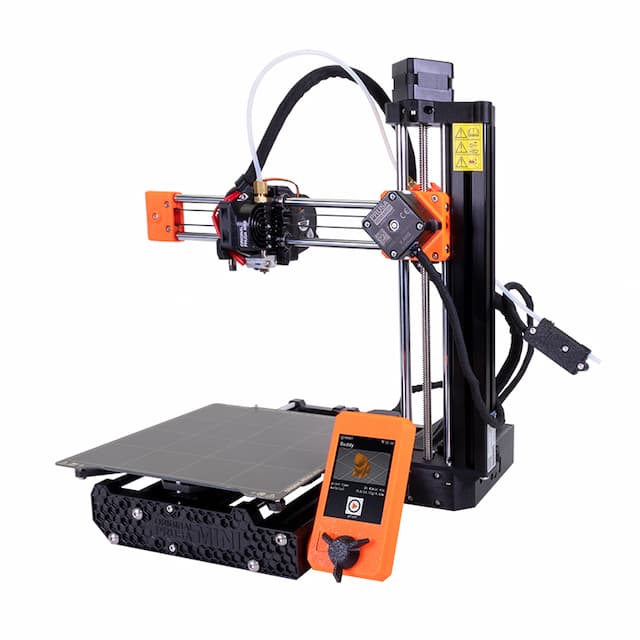
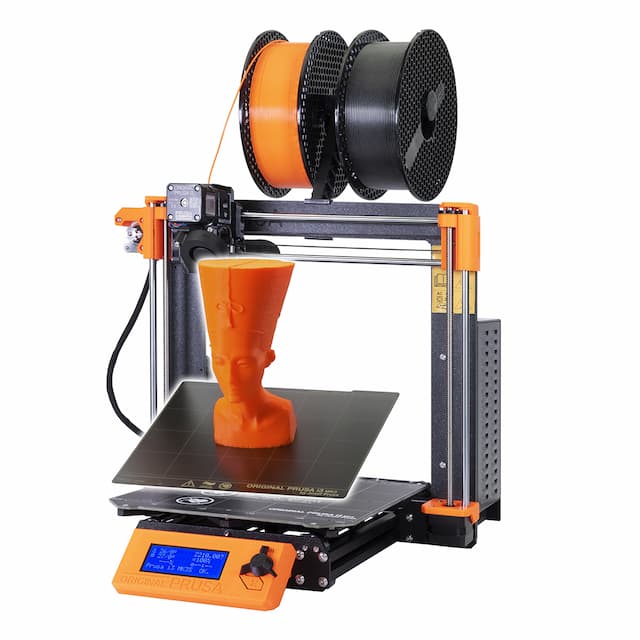
This guide will provide an introduction to Fused Deposition Modelling (FDM) 3D printing using either of the Prusa brand printers we have in HatchLabs:
- Original Prusa MINI+
- Build volume: 180 x 180 x 180mm
- 0.4mm nozzle

- Original Prusa i3 MK3S+
- Build volume: 250 x 210 x 210 mm
- 0.6mm nozzle

Before you start: download and install PrusaSlicer
- Inside the "Configuration Assistant" select the above printers/ nozzle sizes. After you have selected them click "finish".
Introduction
In HatchLabs we have two different types of 3D printers: FDM printers and Stereolithography apparatus (SLA) printers. You can find out more about inductions on the SLA printers on the homepage. In this guide we will cover FDM 3D printing.
In FDM printing, solid thermoplastic material is deposited in layers to create a 3D printed object. During printing, the plastic filament is fed through a hot extruder where the plastic gets soft enough that it can be precisely placed by the print head. The melted filament is then deposited layer by layer in the print area to build the workpiece. (source)

(image source)
FDM printing is a great way to learn about 3D printing and a good tool for prototyping. That being said, don’t assume that you will create smooth artworks and prints right away. Understanding more about the print process comes with
experimenting, and you are encouraged to make many (small) tests.
Important things you should know
- No maintenance on the machine. If you think something is wrong, or not printing well, ask a member of hatchlabs staff to help/ email us at hatchlabs@doc.gold.ac.uk
- Do not change the filament any of the machines. There are 3 colours of filament installed in the printers at all times so you should never need to change the filament. The Hatchlabs Staff can assist if you require a specific colour or filament type.
- Never level the bed. If you think it’s not levelled well, ask a member of hatchlabs staff.
- Do not put glue/adhesives on the buildplate.
- You must arrange prints longer than 5 hours with hatchlabs staff - if your prints are very long usually there are ways to reduce this/ problems with your settings.
- Simultaneous use of multiple printers is permitted if agreed to by hatchlabs staff.
Resources
Materials for 3D FDM Printing
In HatchLabs the main material we use with the Prusa Printers is PLA (polylactic acid).
This is one of the most widely used 3D printing materials and also the recommended material for beginners.
This material is free to use and students are expected to exercise common sense and moderation in their use of consumables (as part of HatchLabs’ consumables fair use policy included in the code of conduct). If you want to use filament not provided by the lab you must contact a hatchlabs technician first.
Tutorial
We offer scheduled inductions on the 3D FDM printers which will guide you through modelling and printing your first print. We are happy for students to complete the induction independently, and ask that you follow the 3D printing modelling tutorial in Fusion 360 or Tinkercad, and show us in person/send us a picture of your 3D print to hatchlabs@doc.gold.ac.uk
Glossary
- Model: the 3D digital object (.obj, .stl file) we want to turn into a physical object
- Filament: Spools of plastic thread which we will use to print our model
- Slicing: Process by which the "slicer" software (we use Prusa Slicer) converts our 3D model into "sliced" individual layers of filament, and a tool path for the printer to follow (.gcode file).
- Build plate/ bed/ platform: The surface we print onto.
Modelling
In order to print using the 3D printers we first need a 3D file (.obj or .stl). These can be designed using many different softwares, and they can also be downloaded from the web. Your first print must be less than 20 minutes long, so design/download something small and uncomplicated. As we are printing an object from the bottom up you need to consider:
- overhangs
- bridging
- unsupported areas: your first print should not require support structures
Please watch this video before downloading/ designing your first model: FDM 3D Printing: How to prototype like a pro (in 10min!)
If you are experienced with 3D modelling please use whichever software you are comfortable with. If not, here are a couple of tutorials/ resources to get you started with designing/ downloading your model:
- thingiverse - recommended for downloading a model, choose something simple!
- Making Lil’Hats’N’Stuff in Fusion 360- recommended for designing a model with 3D CAD/CAM software Fusion 360
- Exporting STL Files in Fusion 360- how to send your 3D model from Fusion 360 to a slicer software
- tinkercad- 3D CAD design software
- Prusa printers prints - similar to thingiverse
- grabcad library
- NASA 3D Models
Slicing
Slicing is the process by which the software (we use Prusa Slicer) converts our 3D Model (.obj, .stl file) into "sliced" individual layers, and a tool path for the printer to follow (.gcode file).
-
Open Prusa Slicer
-
Follow the steps in the configuration wizard, and select Prusa i3 MK3S with 0.4mm Nozzle. And Prusa Mini+ With 0.4mm Nozzle.
-
Click the Cube with a Plus sign and open your STL File.
-
Select the appropriate printer by selecting from the drop down list of printers in the top left of the app (printer selection panel on the right).

-
Orientation. Click on the model and use the Rotate tool (left panel, 3rd from the top) to rotate your object if necessary.
The orientation of the model above makes sense because:- minimal/no overhangs: overhangs are parts of the print that extends out past the previous layer by more than 45 degrees, and so will be "unsupported" (see below for more information on supports/ printing with overhangs)
- the biggest possible surface is directly on the buildplate and will be our first layer (i.e the base of the pyramid is the biggest, flat section of the model)
If your model does require support in the future then you can select Support under the print settings to generate support (for specific settings please see below). Supports are extra pieces of plastic printed that structurally support any overhangs/ unsupported parts of your print.
- Set the print quality using the presets in the top right.
- Print settings A thicker layer height will print faster, but the print will be rougher and will be less accurate to what was designed. We recommend using "0.25mm DRAFT" for geometric, test prints and using "0.15mm QUALITY" for more complicated, sculptural prints.
- infill: 20% - this defines the amount of filament used inside the print. The more infil, the longer the print will take but the more solid it will be.
- Check estimated time (right bottom corner of settings panel). We want to make a small print for the first time, less than 20 minutes.
- If the time is longer than 20 minutes, scale the model using the scale function on the left menu panel
-
Take a USB stick from one of the printers that isn't printing and insert it into your computer.
-
Select Export G-Code and save the file to the PRUSA_MINI USB Stick
-
Eject the USB stick and let’s go to the 3D printers.
- Is the platform clean? The printers will do an inital line of printing at the front of the platform, ensure there is nothing on the platform before printing (if there’s someone’s completed print - remove it and put it to the side of the printer)
- Is there enough filament? If not please inform a member of hatchlabs staff. DO NOT CHANGE THE FILAMENT!
- Do you have enough time to complete the print? You need to be there for the first 10-15 minutes to ensure everything is printing correctly.
- Place the USB stick in the 3D printer, the USB port is near the back on the right hand side.
- The printer should automatically pop up an image of your print. If this is correct press Print using the jog wheel to navigate and clicking the jog wheel to select. If the image does not pop up or is incorrect, select Return, and then select print to choose from a list of files on the USB Stick.
- Watch the Printer heat and up and begin printing. After the Nozzle lowers the printer will proceed to check the build plate in a number of places before printing a test line at the front of the bed.
- Continue to watch your print for the first 10 minutes. We need to ensure the filament is extruding properly and the printing is sticking to the bed.
- To take the model off the printer without damaging - wait 3-5 minutes after the print is complete (see reference gif below)
- DO NOT yank your print off the bed. You can damage both the model and the printer.
- Lift off the bed using the two corners that protrude at the front of the printer.
- Gently flex the bed to loosen the parts, then use the spatula with rounded corners to remove anything from the build plate. Make sure to remove the line of filament at the front of the plate.
- If you used a brim (the extra material around your first layer) this should be easy without any tool.
- Remove the brim from your 3D print by hand and then using a deburrer or file.
- A caliper is a device used to measure the dimensions of an object (source)
- Watch this video on how to use Vernier Calipers
- Reading measurements from vernier calipers:


Printing
Before you press print

Starting your print
When the print is done

Measuring your print
We recommend using a pair of calipers to measure/ inspect your 3D prints. These are also very useful for when you are modelling objects that have specific dimensions.


FAQs
Q: There’s no filament coming out of the nozzle?
A: Is there enough filament? Show the printer to a technician and you can debug together/ email us at hatchlabs@doc.gold.ac.uk
Q: The print started off fine and is now printing in mid air!
A: The printer might be exposed to cold air conditioning which cools the build plate. Inform a technician.
Q: My material warped and lifted slightly as it printed.
A: In PrusaSlicer have you selected some form of build plate adhesion? This helps the print stay on the plate during printing.
Tips and Tricks
Please read and refer to the tips and tricks, but do not attempt any maintenance that might be suggested.